


If you love the bold, tangy, and sweet flavors of your favorite Chinese takeaway, you’ll absolutely adore this homemade Crispy Chilli Chicken. With its irresistible crunchy coating, sticky, spicy-sweet sauce, and restaurant-style flavors, this dish is guaranteed to impress — and it’s easier to make at home than you might think!
Crispy Chilli Chicken is one of those dishes that hits every flavor note: crispy, savory, sweet, spicy, and a little tangy. The double-frying method ensures your chicken stays crunchy even after tossing it in a luscious honey-sriracha sauce. Perfect for serving with rice, noodles, or even on its own, this dish will become your new go-to whenever you’re craving Chinese-inspired comfort food.
Why You’ll Love This Crispy Chilli Chicken
- Crispy, restaurant-style coating with no soggy pieces
- Sweet and spicy glaze that perfectly balances flavors
- Easy to make at home with simple ingredients
- Crowd-pleaser that’s great for dinner parties or family meals
- Ready in about 30 minutes — faster than takeout!

Ingredients (Serves 3)
For the Chicken:
- 300 g chicken breast, cut into thin strips
- 1 egg white
- 100 g cornflour (more if needed)
- 1 tsp garlic and ginger paste
- 2 spring onions, sliced
- Vegetable oil, for frying
Chicken Marinade:
- 2 tbsp dark soy sauce
- 1 tbsp garlic and ginger paste
- 1 tsp sesame oil
- 1 tsp sugar
- 1 tsp white pepper
Stir Fry Sauce:
- 3 tbsp dark soy sauce
- 4 tbsp honey
- 1 tbsp sriracha
- 2 tbsp lemon juice
Step-by-Step Instructions
Step 1: Prep the Chicken
Begin by slicing the chicken breast into thin, bite-sized strips for even frying.
In a mixing bowl, combine the chicken with dark soy sauce, garlic and ginger paste, sesame oil, sugar, and white pepper. Mix thoroughly and let marinate for at least 10 minutes to let the flavors develop.
Step 2: Prepare the Stir Fry Sauce
In a separate bowl, mix together the honey, lemon juice, dark soy sauce, and sriracha. Stir until smooth and set aside. This sticky, tangy, and slightly spicy sauce is what will give your chicken its irresistible flavor.
Step 3: Coat the Chicken
After marinating, add the egg white to the chicken and mix well to help the coating stick. Then, sprinkle in the cornflour, stirring until each piece of chicken is thoroughly coated. You should have a slightly thick, dry batter that will crisp beautifully when fried.
Step 4: Fry the Chicken
Heat vegetable oil in a wok or deep pan to 180°C (350°F). Fry the chicken strips in batches, making sure not to overcrowd the pan. Fry each piece for 1–2 minutes until just golden. Remove to a plate lined with paper towels.
Double-frying tip: After the first round of frying, fry the chicken again for an additional 2–3 minutes until super crispy. Double frying is the secret to crunchy, restaurant-style chicken.
Step 5: Prepare the Sauce Base
In a clean pan, heat 1 tablespoon of vegetable oil over medium heat. Add the garlic and ginger paste, frying quickly for 5–10 seconds until fragrant.
Pour in the stir fry sauce you prepared earlier and stir continuously for about 30 seconds, until the sauce thickens and turns glossy.
Step 6: Combine
Add the freshly fried chicken strips to the sauce and toss until each piece is thoroughly coated in the sticky, sweet, spicy sauce. Sprinkle over sliced spring onions for freshness and a pop of color.
Step 7: Serve
Serve your Crispy Chilli Chicken hot, straight from the wok. It pairs beautifully with steamed jasmine rice, egg fried rice, or noodles. Add a side of stir-fried vegetables for a complete meal.
Tips for Success
- Use thinly sliced chicken for faster cooking and maximum crispiness
- Double-frying guarantees a crispy texture even after tossing in sauce
- Marinate the chicken for at least 10 minutes to absorb the flavors
- Control the spice: adjust the sriracha according to your heat tolerance
- Serve immediately for the crispiest texture
Why This Recipe Works
This recipe uses a simple marinade with soy sauce, garlic, ginger, and sesame oil to build a flavor-packed base for the chicken. The cornflour coating combined with egg white creates a light yet incredibly crunchy texture once fried, while the double-fry method ensures that crunch stays intact even after mixing with the sauce.
The sauce itself is a perfect harmony of sticky honey sweetness, spicy sriracha, umami-rich soy sauce, and the brightness of fresh lemon juice — a balance you’d expect from your favorite takeaway, made healthier and fresher at home.
Storage & Reheating
Storage: Store leftover crispy chilli chicken in an airtight container in the refrigerator for up to 3 days.
Reheating: Reheat in the air fryer or oven at 350°F for about 5–8 minutes until hot and crispy again. Microwaving is not recommended as it will make the coating soggy.
Variations
- Vegetarian version: Try swapping chicken for tofu or cauliflower
- Extra heat: Add a pinch of crushed red pepper flakes
- Different sweeteners: Use maple syrup or agave instead of honey
- Peanut twist: Add a splash of peanut butter to the sauce for a nutty kick
Serving Suggestions
- Serve over jasmine or basmati rice
- Pair with stir-fried broccoli, snow peas, or bok choy
- Sprinkle with toasted sesame seeds for an extra crunch
- Squeeze over fresh lime for a zesty finish
Perfect for These Occasions
- Weeknight dinners
- Game-day snacks
- Casual parties
- Potlucks
- Date nights at home
Final Thoughts
There’s a reason Crispy Chilli Chicken is such a beloved dish at Chinese restaurants worldwide — the satisfying crunch, sticky-sweet heat, and bold, balanced flavors are simply irresistible. Making it at home gives you total control over the spice, sweetness, and crispiness, and you’ll love how quickly it comes together.
Perfect for a cozy night in or a dinner with friends, this dish is guaranteed to steal the spotlight and satisfy all your takeaway cravings without leaving the house.
The Goods

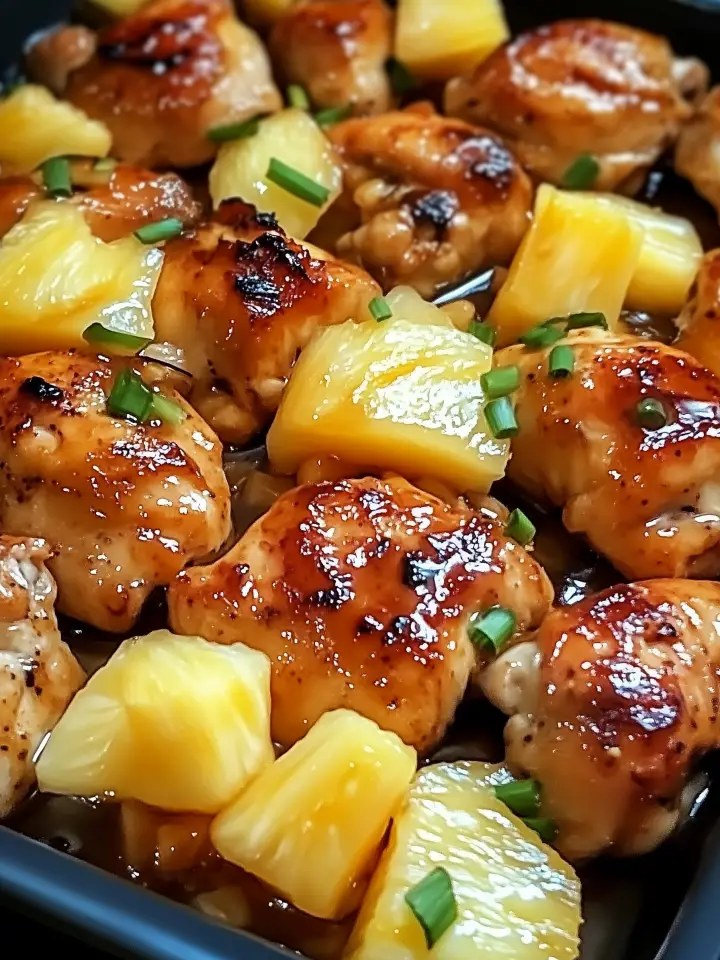
Crispy Chilli Chicken
We appreciate you taking the time to rate!
Recipes
For the Chicken:
- 300 g chicken breast cut into thin strips
- 1 egg white
- 100 g cornflour more if needed
- 1 tsp garlic and ginger paste
- 2 spring onions sliced
- Vegetable oil for frying
Chicken Marinade:
- 2 tbsp dark soy sauce
- 1 tbsp garlic and ginger paste
- 1 tsp sesame oil
- 1 tsp sugar
- 1 tsp white pepper
Stir Fry Sauce:
- 3 tbsp dark soy sauce
- 4 tbsp honey
- 1 tbsp sriracha
- 2 tbsp lemon juice
Instructions
Step 1: Prep the Chicken
- Begin by slicing the chicken breast into thin, bite-sized strips for even frying.
- In a mixing bowl, combine the chicken with dark soy sauce, garlic and ginger paste, sesame oil, sugar, and white pepper. Mix thoroughly and let marinate for at least 10 minutes to let the flavors develop.
Step 2: Prepare the Stir Fry Sauce
- In a separate bowl, mix together the honey, lemon juice, dark soy sauce, and sriracha. Stir until smooth and set aside. This sticky, tangy, and slightly spicy sauce is what will give your chicken its irresistible flavor.
Step 3: Coat the Chicken
- After marinating, add the egg white to the chicken and mix well to help the coating stick. Then, sprinkle in the cornflour, stirring until each piece of chicken is thoroughly coated. You should have a slightly thick, dry batter that will crisp beautifully when fried.
Step 4: Fry the Chicken
- Heat vegetable oil in a wok or deep pan to 180°C (350°F). Fry the chicken strips in batches, making sure not to overcrowd the pan. Fry each piece for 1–2 minutes until just golden. Remove to a plate lined with paper towels.
- Double-frying tip: After the first round of frying, fry the chicken again for an additional 2–3 minutes until super crispy. Double frying is the secret to crunchy, restaurant-style chicken.
Step 5: Prepare the Sauce Base
- In a clean pan, heat 1 tablespoon of vegetable oil over medium heat. Add the garlic and ginger paste, frying quickly for 5–10 seconds until fragrant.
- Pour in the stir fry sauce you prepared earlier and stir continuously for about 30 seconds, until the sauce thickens and turns glossy.
Step 6: Combine
- Add the freshly fried chicken strips to the sauce and toss until each piece is thoroughly coated in the sticky, sweet, spicy sauce. Sprinkle over sliced spring onions for freshness and a pop of color.
Step 7: Serve
- Serve your Crispy Chilli Chicken hot, straight from the wok. It pairs beautifully with steamed jasmine rice, egg fried rice, or noodles. Add a side of stir-fried vegetables for a complete meal.


Leave a Reply