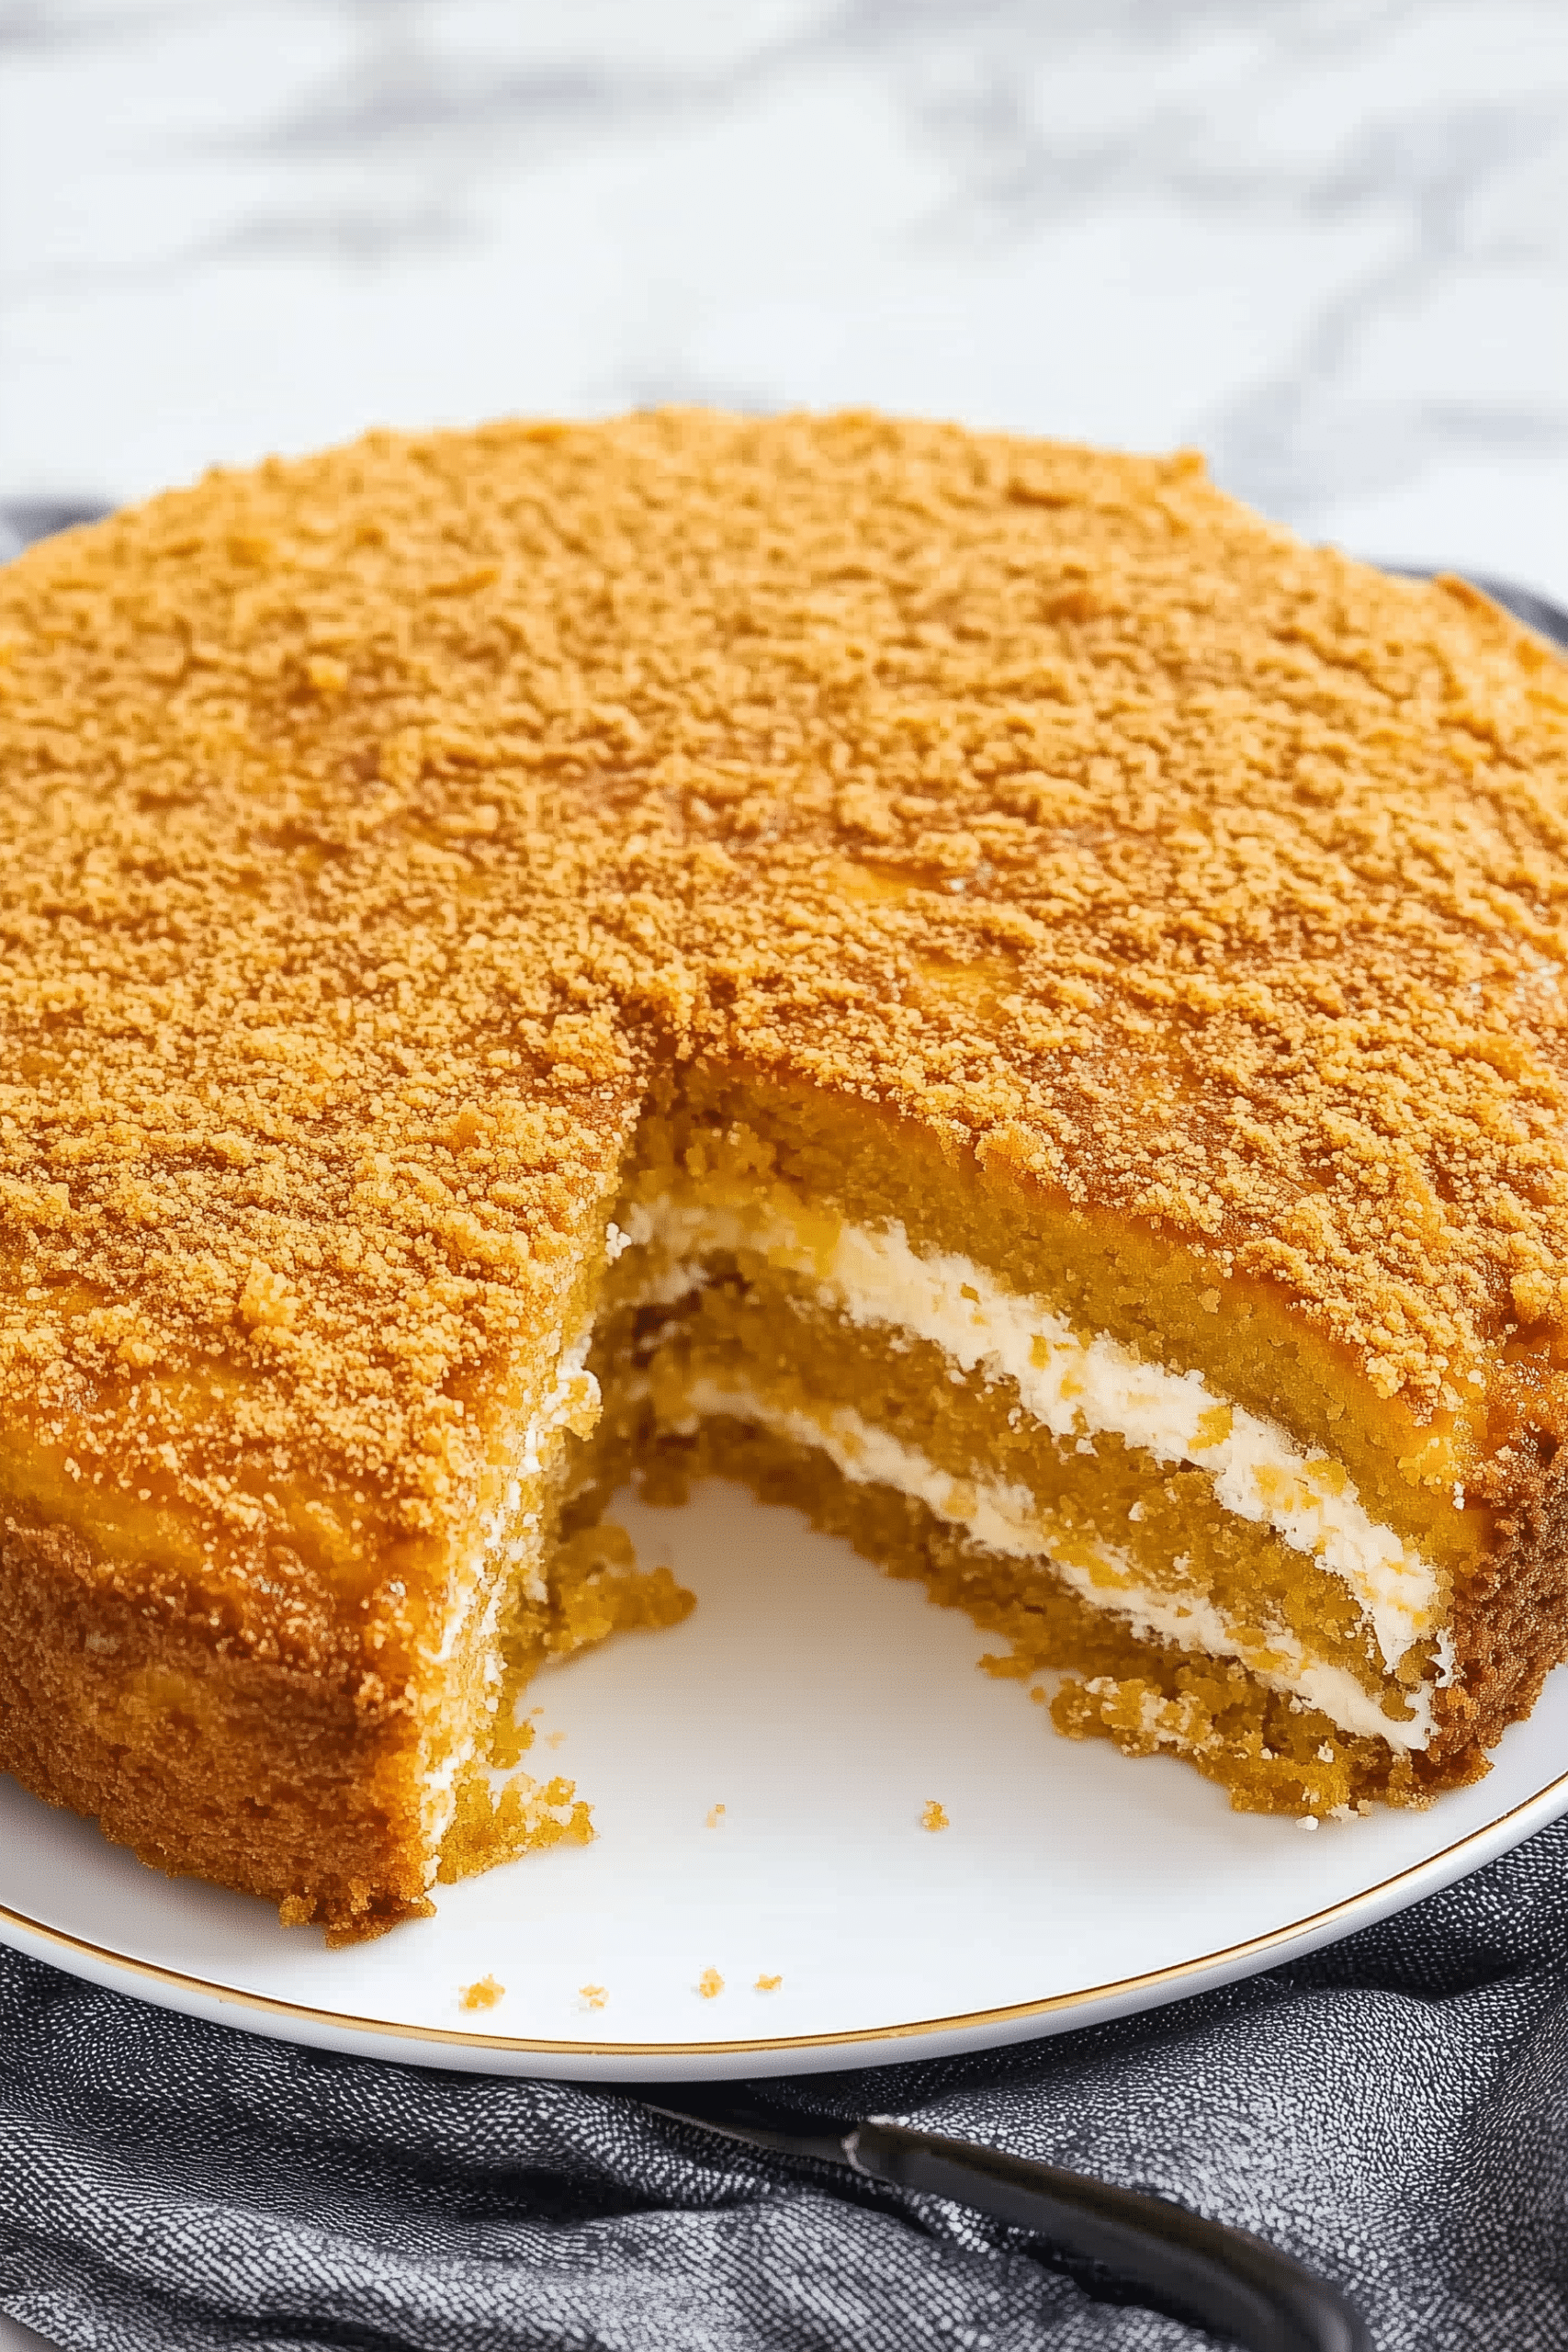
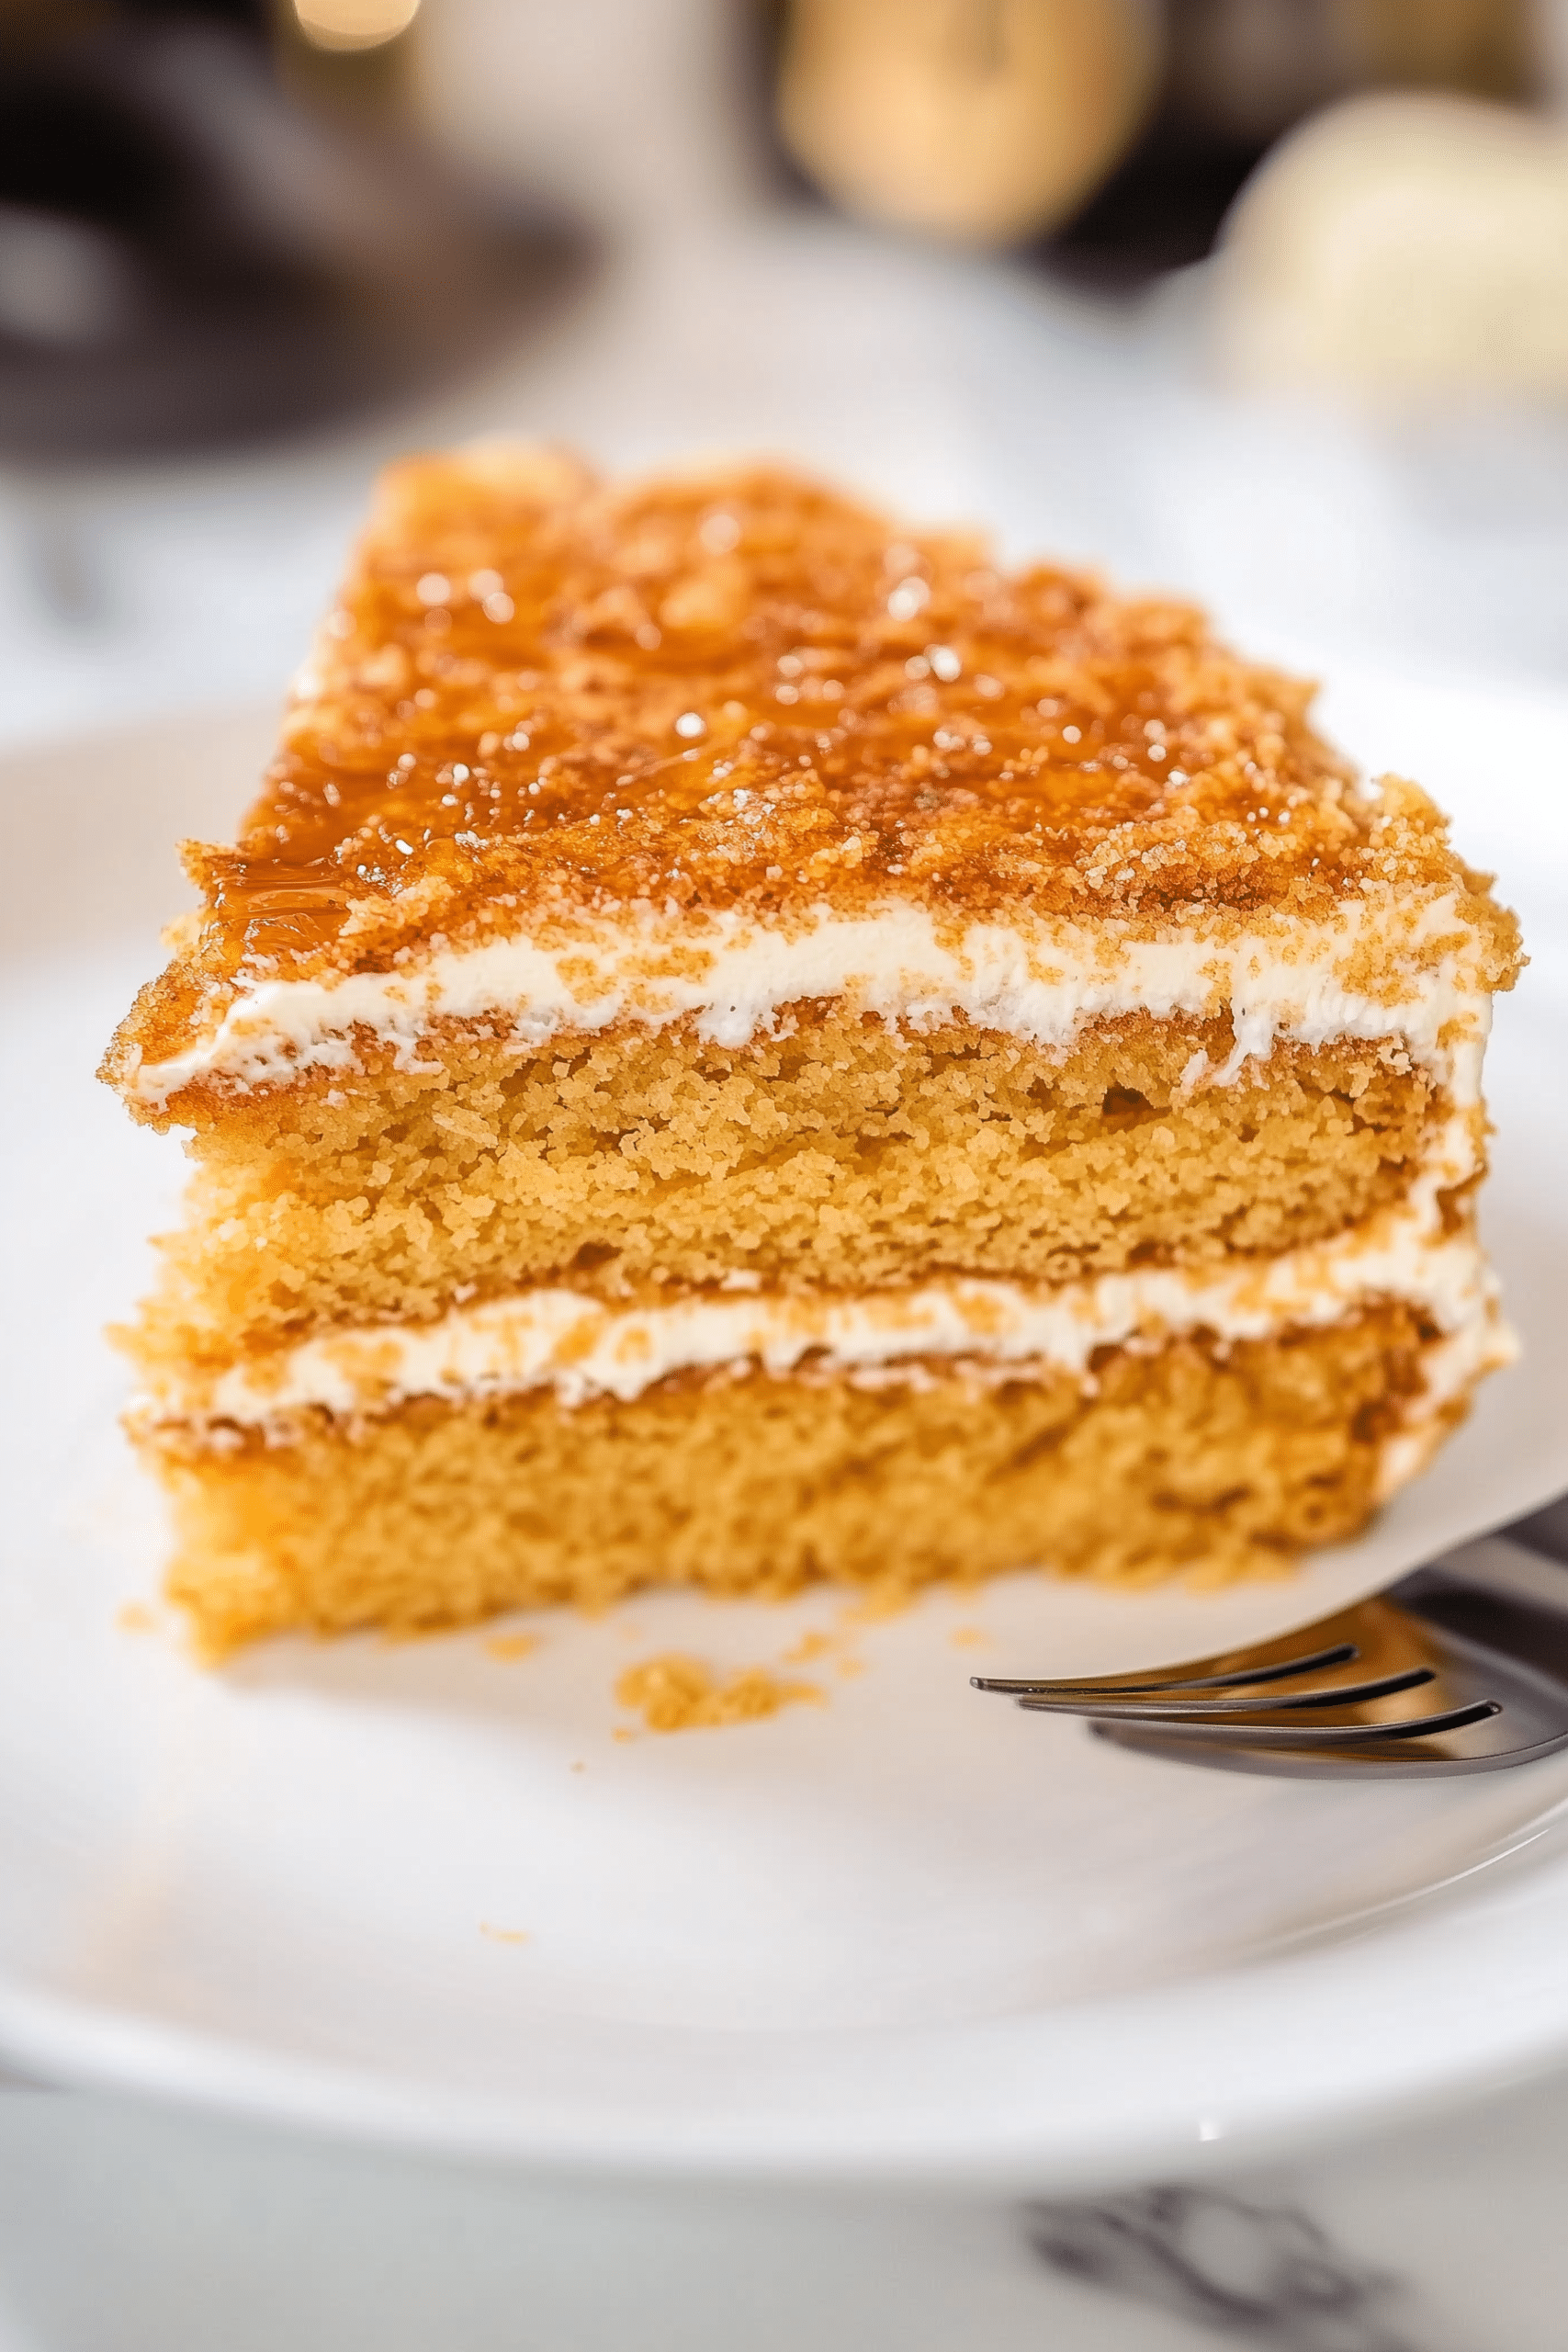
If you’ve never tried a slice of Russian Honey Cake (Medovik), you’re in for a treat. This classic Eastern European dessert is a beloved showstopper, layered with thin honey-flavored sponge cakes and a light sour cream frosting. Medovik is famous for its balanced sweetness, gentle honey aroma, and a melt-in-your-mouth creamy texture.
Traditionally served at celebrations and holidays, this cake is surprisingly simple to make with a bit of patience. Thin layers of honey-infused sponge bake quickly, then are stacked with a tangy, fluffy cream. A final coat of golden honey crumbs gives the cake its rustic, elegant look.
Why You’ll Love This Russian Honey Cake
- Unique honey flavor — warm, floral, and beautifully nostalgic
- Soft layers — delicate sponge cake that soaks up the cream
- Make-ahead dessert — actually tastes better after resting
- Visually stunning — perfect centerpiece for parties and holidays
- Simple ingredients — honey, flour, eggs, and cream
Ingredients (Serves 8)
Sponge Cake:
- 3 large eggs
- 1 cup clover honey
- 2 cups all-purpose flour
- 2 teaspoons baking soda
- 1 tablespoon white distilled vinegar
Sour Cream Frosting:
- 8 ounces Cool Whip, thawed
- 1 cup sour cream (Daisy brand recommended)
Step-by-Step Instructions
Step 1: Prep the Baking Equipment
Preheat your oven to 350°F (175°C).
Cut 4 pieces of parchment paper to fit an inverted half-sheet baking pan (18×13 inches). This makes spreading and baking the thin layers much easier.
Step 2: Make the Sponge Cake Batter
In a large mixing bowl, beat the eggs and honey together for about 2 minutes, until smooth and slightly thickened.
In a small bowl, dissolve the baking soda in the vinegar (it will bubble). Pour this mixture into the egg and honey batter and stir to combine.
Gradually add the flour, mixing until you have a soft, slightly runny batter.
Step 3: Bake the Cake Layers
Spread about ½ cup of batter thinly over one of the prepared parchment sheets, making sure to reach the corners of the baking sheet for even layers.
Bake each layer for 7 minutes, until lightly golden and set. Repeat until you have baked all 4 sheets of batter.
Allow the layers to cool completely before peeling off the parchment.
Step 4: Cut and Prepare Layers
Once cooled, place a 7- to 8-inch plate or cake ring on each baked sheet, and cut out two circles from each sheet (for a total of 8 round layers). Reserve the leftover scraps.
Place the leftover cake scraps on a baking sheet and bake at 275°F (135°C) for 5–8 minutes to dry them out. Once cooled, crush these scraps into fine crumbs using a rolling pin or food processor. These will be used for the decorative topping.
Step 5: Make the Sour Cream Frosting
In a medium bowl, whisk together the Cool Whip and sour cream until smooth and creamy. Avoid overmixing to keep it light and fluffy.
Step 6: Assemble the Cake
Place the first cake round on a serving plate. Spread a thin layer of the sour cream frosting on top. Repeat with each cake layer, stacking them evenly until all 8 layers are used.
Frost the top and sides of the cake generously.
Sprinkle the crushed cake crumbs evenly over the top and press gently into the sides for a beautiful finish.
Step 7: Chill
Cover the cake loosely with plastic wrap and refrigerate for at least 1 hour, but ideally overnight. The cream will soak into the layers, making them perfectly soft and cohesive.
Tips for Success
- Work quickly when spreading the batter — the thin layers bake fast!
- Keep the frosting light by not overmixing
- Cool the layers completely before cutting to avoid breakage
- Let it rest overnight for the best flavor and texture
- Use mild-flavored honey like clover to keep the flavor balanced
Why This Russian Honey Cake Works
Medovik has been popular for generations because of its simplicity and deep flavor. The honey layers are subtle yet rich, while the sour cream frosting gives a slight tang that balances out the sweetness. Once assembled, the thin layers soften into a cake that slices beautifully and practically melts in your mouth.
Storage
- Store in the refrigerator, covered, for up to 4 days.
- The cake actually improves on the second or third day as the layers continue to soak in the cream.
- Freezing is not recommended, as the cream will separate when thawed.
Variations
- Homemade whipped cream: Substitute Cool Whip with homemade whipped cream for a fresher flavor
- Add walnuts: Sprinkle finely chopped walnuts between layers for a crunch
- Chocolate twist: Dust the top with cocoa powder for a chocolate-honey combination
- Spiced honey cake: Add a pinch of cinnamon or nutmeg to the sponge batter
Serving Suggestions
- Serve chilled with black tea or coffee
- Garnish with fresh berries for a pop of color
- Dust lightly with powdered sugar for a snowy look
Perfect for These Occasions
- Christmas or Easter
- Russian-themed dinners
- Birthday celebrations
- Family get-togethers
- Mother’s Day or Father’s Day
Final Thoughts
Russian Honey Cake (Medovik) is the kind of dessert that brings people together, evoking warm memories and traditions. Its beautiful layers, mild honey sweetness, and creamy frosting make it truly unforgettable. Whether you’re celebrating a special occasion or simply want to try something new, this recipe is guaranteed to impress.
Once you’ve made it once, you’ll see why it’s treasured by so many. A bit of time and love goes into it, but the results are absolutely worth every moment.
The Goods

Russian Honey Cake (Medovik)
We appreciate you taking the time to rate!
Recipes
Sponge Cake:
- 3 large eggs
- 1 cup clover honey
- 2 cups all-purpose flour
- 2 teaspoons baking soda
- 1 tablespoon white distilled vinegar
Sour Cream Frosting:
- 8 ounces Cool Whip thawed
- 1 cup sour cream Daisy brand recommended
Instructions
Step 1: Prep the Baking Equipment
- Preheat your oven to 350°F (175°C).
- Cut 4 pieces of parchment paper to fit an inverted half-sheet baking pan (18×13 inches). This makes spreading and baking the thin layers much easier.
Step 2: Make the Sponge Cake Batter
- In a large mixing bowl, beat the eggs and honey together for about 2 minutes, until smooth and slightly thickened.
- In a small bowl, dissolve the baking soda in the vinegar (it will bubble). Pour this mixture into the egg and honey batter and stir to combine.
- Gradually add the flour, mixing until you have a soft, slightly runny batter.
Step 3: Bake the Cake Layers
- Spread about ½ cup of batter thinly over one of the prepared parchment sheets, making sure to reach the corners of the baking sheet for even layers.
- Bake each layer for 7 minutes, until lightly golden and set. Repeat until you have baked all 4 sheets of batter.
- Allow the layers to cool completely before peeling off the parchment.
Step 4: Cut and Prepare Layers
- Once cooled, place a 7- to 8-inch plate or cake ring on each baked sheet, and cut out two circles from each sheet (for a total of 8 round layers). Reserve the leftover scraps.
- Place the leftover cake scraps on a baking sheet and bake at 275°F (135°C) for 5–8 minutes to dry them out. Once cooled, crush these scraps into fine crumbs using a rolling pin or food processor. These will be used for the decorative topping.
Step 5: Make the Sour Cream Frosting
- In a medium bowl, whisk together the Cool Whip and sour cream until smooth and creamy. Avoid overmixing to keep it light and fluffy.
Step 6: Assemble the Cake
- Place the first cake round on a serving plate. Spread a thin layer of the sour cream frosting on top. Repeat with each cake layer, stacking them evenly until all 8 layers are used.
- Frost the top and sides of the cake generously.
- Sprinkle the crushed cake crumbs evenly over the top and press gently into the sides for a beautiful finish.
Step 7: Chill
- Cover the cake loosely with plastic wrap and refrigerate for at least 1 hour, but ideally overnight. The cream will soak into the layers, making them perfectly soft and cohesive.









Leave a Reply