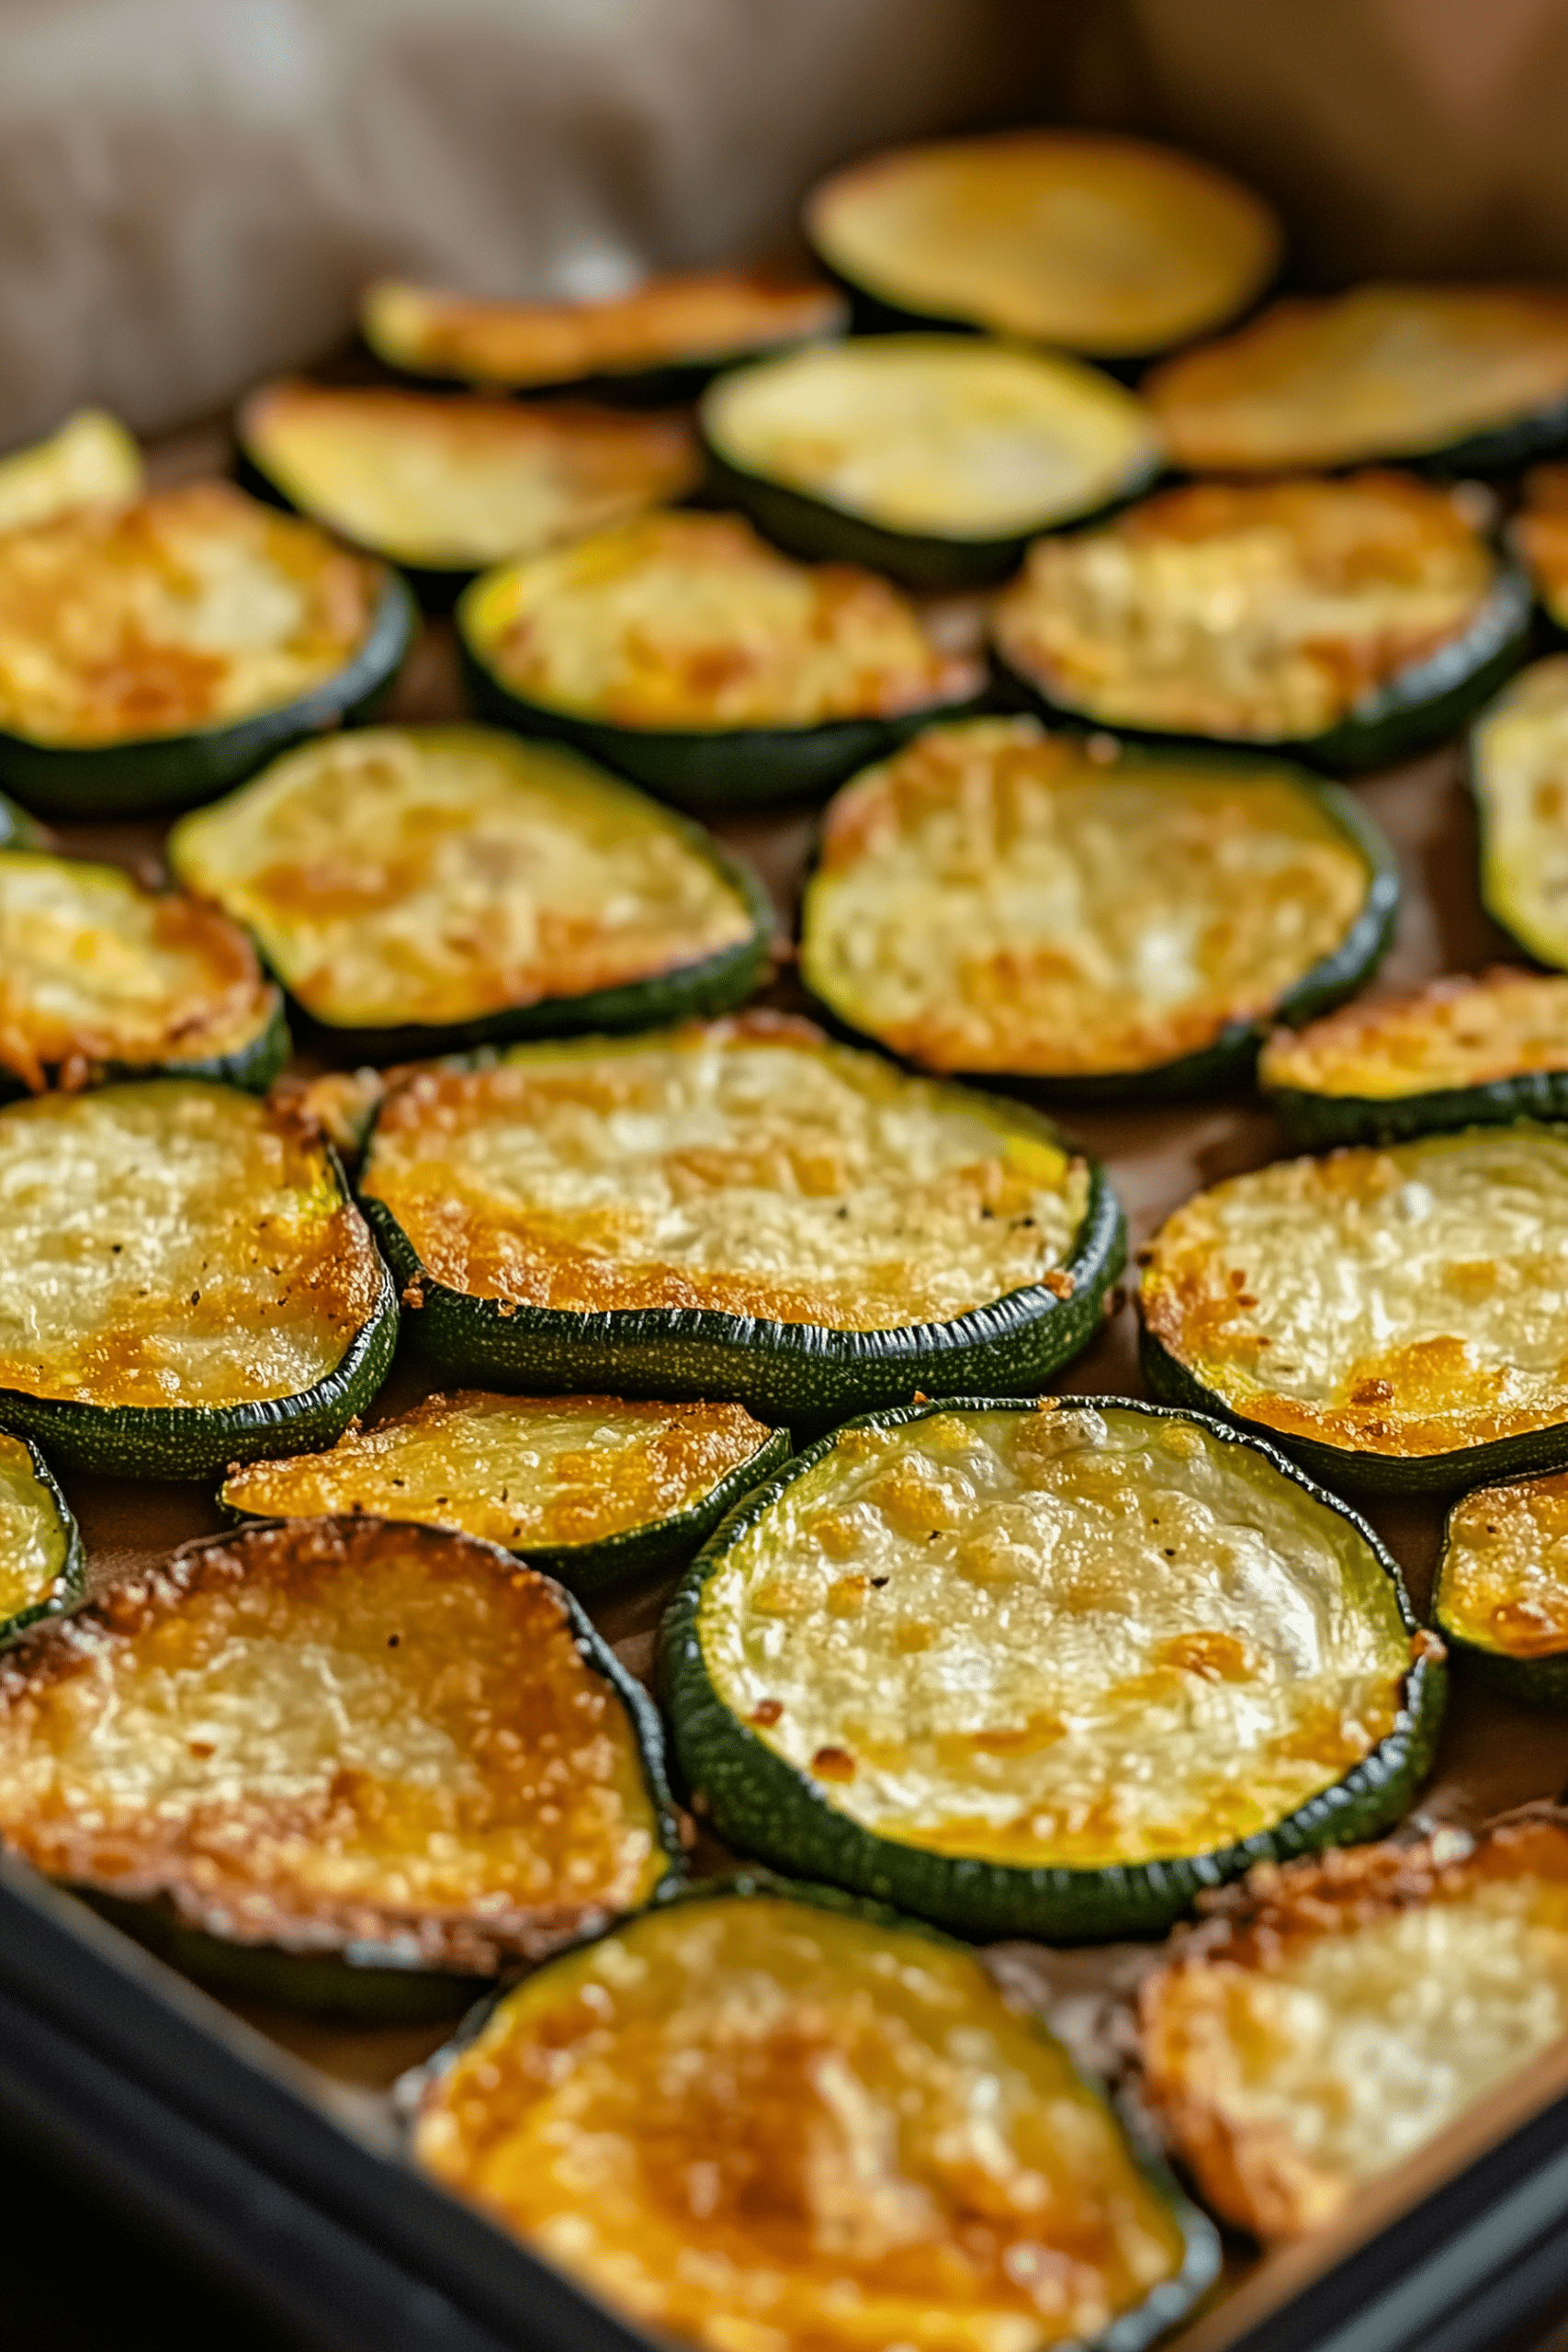
If you’re craving a healthier, satisfying, and incredibly crunchy snack, look no further than these Crispy Zucchini Chips. Made with fresh zucchini, simple spices, and just a hint of olive oil, these oven-baked chips are the perfect alternative to traditional potato chips. They deliver a satisfying crunch, a pop of flavor, and a guilt-free way to snack whether you’re hosting a party, enjoying a movie night, or just looking for a nutritious side.
Zucchini is naturally low in calories but packed with fiber and nutrients, making it an ideal base for a crunchy chip. By slowly baking the slices at a low temperature, you’ll achieve that crave-worthy crisp without frying, making this recipe both healthy and family-friendly.
Why You’ll Love These Crispy Zucchini Chips
- Healthy & wholesome: Made with real vegetables and no deep-frying
- Easy to prepare: Only 10 minutes of hands-on time
- Perfectly seasoned: Garlic, paprika, and parmesan add delicious flavor
- Kid-friendly: Even picky eaters will love them
- Versatile: Serve as a snack, appetizer, or side

Ingredients (Serves 4)
- 2 medium zucchinis
- 1–2 tablespoons olive oil (or avocado oil for a lighter choice)
- ½ teaspoon sea salt
- ½ teaspoon garlic powder
- ½ teaspoon smoked paprika (optional)
- ¼ teaspoon black pepper
- 2 tablespoons grated parmesan cheese (optional, but highly recommended)
Step-by-Step Instructions
Step 1: Preheat Your Oven
Set your oven to 250°F (120°C). This low temperature will gently dehydrate the zucchini slices so they crisp up without burning.
Step 2: Prepare the Zucchini
Wash and dry your zucchinis well. Using a sharp knife or a mandoline slicer, cut the zucchini into thin, even rounds, about ⅛-inch thick. Thin slices are key to achieving the best crispy texture.
If you have a mandoline slicer, it makes the process quicker and ensures consistent slices, which means more even baking.
Step 3: Draw Out Excess Moisture
Since zucchini is full of water, it’s crucial to remove as much moisture as possible to prevent soggy chips.
Lay the zucchini slices on a paper towel-lined tray and lightly sprinkle them with salt. Let them rest for about 10 minutes. The salt will help draw out water.
After 10 minutes, gently blot the slices with another paper towel to absorb the released moisture.
Step 4: Season the Slices
Place the zucchini rounds in a large bowl. Drizzle with olive oil and toss to coat. Sprinkle in the sea salt, garlic powder, smoked paprika, black pepper, and parmesan if using. Toss again to ensure even seasoning.
Step 5: Arrange and Bake
Line a baking sheet with parchment paper to prevent sticking. Arrange the zucchini slices in a single layer on the sheet, making sure they do not overlap — overlapping will make them soggy instead of crispy.
If needed, use a second baking sheet to space them out.
Step 6: Bake Slowly
Place the baking sheets in the preheated oven and bake for 1.5 to 2 hours, flipping the chips halfway through. Baking at a low temperature allows the chips to slowly dehydrate, becoming crisp and golden without burning.
After about 90 minutes, check the chips. If they’re not yet fully crisp, continue baking, checking every 10 minutes.
Step 7: Cool and Serve
When the chips are golden brown and crispy, remove them from the oven. Let them cool on the baking tray for about 5 minutes — they will crisp up even more as they cool.
Serve immediately for the best crunch. If you like, sprinkle with a little extra parmesan or fresh herbs for added flavor.
Tips for Success
- Uniform slices: Thin, even slices bake evenly and crisp up properly
- Don’t skip moisture removal: Salting and blotting the zucchini ensures they don’t get soggy
- Use parchment paper: Prevents sticking and makes for easy cleanup
- Watch closely: Every oven is different, so check after 90 minutes to avoid over-browning
- Serve immediately: Homemade veggie chips are best enjoyed fresh
Why This Recipe Works
Zucchini’s mild, slightly sweet flavor makes it the perfect blank canvas for spices and seasonings. Slowly dehydrating the slices at low heat preserves the zucchini’s subtle flavor while giving it a light, crunchy texture. The olive oil helps the chips crisp, while the parmesan cheese adds a savory, nutty richness and a bit of extra crunch.
The garlic and smoked paprika boost the flavor even more, turning humble zucchini into a snack you’ll crave again and again.
Storage
Storage: These zucchini chips are best served right away, but you can store any leftovers in an airtight container for up to 2 days. Keep in mind they may soften slightly over time.
Re-crisping tip: Pop them back into the oven at 250°F for about 5–10 minutes if they lose their crunch.
Variations
- Spicy kick: Add ¼ teaspoon cayenne pepper for a hint of heat
- Herb blend: Sprinkle with dried Italian herbs or oregano
- Lemon zest: Add a bit of lemon zest for a bright, fresh twist
- No cheese: Leave out parmesan for a dairy-free, vegan option
- Air fryer method: You can also make these chips in the air fryer at 300°F for 10–12 minutes, flipping halfway through
Serving Suggestions
- As a healthy snack with hummus or ranch dip
- Served alongside grilled burgers instead of fries
- Crumbled over salads for a crunchy topping
- As a side with grilled chicken, fish, or sandwiches
- On a charcuterie board for a fun veggie addition
Perfect for These Occasions
- Summer BBQs and picnics
- Movie night snacks
- After-school treats
- Healthy lunchboxes
- Casual dinner parties
Final Thoughts
These Crispy Zucchini Chips are proof that a simple vegetable can transform into a mouthwatering snack with just a few pantry staples. They’re budget-friendly, healthier than store-bought chips, and incredibly satisfying to make at home.
Whether you’re serving them as a snack, appetizer, or side dish, you’ll love how easy they are to prepare and how crunchy and flavorful they turn out. Try this recipe the next time you have extra zucchini, and you might never go back to traditional chips again!
The Goods

Crispy Zucchini Chips
We appreciate you taking the time to rate!
Recipes
- 2 medium zucchinis
- 1 –2 tablespoons olive oil or avocado oil for a lighter choice
- ½ teaspoon sea salt
- ½ teaspoon garlic powder
- ½ teaspoon smoked paprika optional
- ¼ teaspoon black pepper
- 2 tablespoons grated parmesan cheese optional, but highly recommended
Instructions
Step 1: Preheat Your Oven
- Set your oven to 250°F (120°C). This low temperature will gently dehydrate the zucchini slices so they crisp up without burning.
Step 2: Prepare the Zucchini
- Wash and dry your zucchinis well. Using a sharp knife or a mandoline slicer, cut the zucchini into thin, even rounds, about ⅛-inch thick. Thin slices are key to achieving the best crispy texture.
- If you have a mandoline slicer, it makes the process quicker and ensures consistent slices, which means more even baking.
Step 3: Draw Out Excess Moisture
- Since zucchini is full of water, it’s crucial to remove as much moisture as possible to prevent soggy chips.
- Lay the zucchini slices on a paper towel-lined tray and lightly sprinkle them with salt. Let them rest for about 10 minutes. The salt will help draw out water.
- After 10 minutes, gently blot the slices with another paper towel to absorb the released moisture.
Step 4: Season the Slices
- Place the zucchini rounds in a large bowl. Drizzle with olive oil and toss to coat. Sprinkle in the sea salt, garlic powder, smoked paprika, black pepper, and parmesan if using. Toss again to ensure even seasoning.
Step 5: Arrange and Bake
- Line a baking sheet with parchment paper to prevent sticking. Arrange the zucchini slices in a single layer on the sheet, making sure they do not overlap — overlapping will make them soggy instead of crispy.
- If needed, use a second baking sheet to space them out.
Step 6: Bake Slowly
- Place the baking sheets in the preheated oven and bake for 1.5 to 2 hours, flipping the chips halfway through. Baking at a low temperature allows the chips to slowly dehydrate, becoming crisp and golden without burning.
- After about 90 minutes, check the chips. If they’re not yet fully crisp, continue baking, checking every 10 minutes.
Step 7: Cool and Serve
- When the chips are golden brown and crispy, remove them from the oven. Let them cool on the baking tray for about 5 minutes — they will crisp up even more as they cool.
- Serve immediately for the best crunch. If you like, sprinkle with a little extra parmesan or fresh herbs for added flavor.









Leave a Reply